Thursday, 5 September 2013

Create custom short code in Wordpress

Wordpress Page content : add short code
[column width="full" place="none" ][recentwork] [/column]
Add function for shortcode creation : File location : webroot\wp-content\themes\currenttheme\functions.php
add_shortcode('recentwork','showrecentworks');

function showrecentworks(){ 
return $content='


Recent Work

Digital Video Camera Lens
Digital World
Aenean aliquet pulvinar dui, nec tempus lectus posuere quis. Proin dignissim
'; }

Thursday, 22 August 2013

Social media Link for Webpage

First, choose a Share Widget style:

  • MULTI POST
    Sharing takes place inside the widget, without taking users away from your site. Preferences are saved so your users can share to more than one service at the same time.
  • DIRECT POST
    Your users will be redirected to Facebook, Twitter, etc when clicking on the corresponding buttons. The widget is opened when users click on "Email" and "ShareThis".
By downloading the code, you agree electronically to the publisher terms of use, privacy policy, and are at least 13 years old.
  • Copy the span tags and place them where you want your buttons to appear in the code.
  • (This style is the most adaptable to any type of page design. We strongly recommend that you place them towards top of the page.)
    <span class='st_sharethis' displayText='ShareThis'></span>
    <span class='st_facebook' displayText='Facebook'></span>
    <span class='st_twitter' displayText='Tweet'></span>
    <span class='st_linkedin' displayText='LinkedIn'></span>
    <span class='st_pinterest' displayText='Pinterest'></span>
    <span class='st_email' displayText='Email'></span>
  • Copy the script tags and place them inside and at the end of your "head" tag.
  • <script type="text/javascript">var switchTo5x=false;</script>
    <script type="text/javascript" src="http://w.sharethis.com/button/buttons.js"></script>
    <script type="text/javascript">stLight.options({publisher: "0441c7af-58fc-4c7a-959d-6538cf3541df", doNotHash: false, doNotCopy: false, hashAddressBar: true});</script>
  • Check out the live Publisher Analytics Demo.
  • Want to see what the mad scientists are cookin'? Follow us on Twitter and Like us on Facebook!

Tuesday, 6 August 2013

File upload size change in Moodle

Windows XP and Server 2003 based Instructions

These instructions presume that you have downloaded the latest PHP 5.3.x Windows zip package and extracted it to C:\PHP. If you have installed PHP to another location then change all references to "C:\PHP" to the location you installed PHP too.
  • Open C:\PHP
  • Right Click the php.ini file in this folder and choose "Open with..." selecting your editor of choice.
  • Press Ctrl + F and type "post_max_size" (click Find...", where needed)
  • Change the value to the number of Mb you want your site to accept as uploads
  • Press Ctrl + F and type "upload_max_filesize" (click Find...", where needed)
  • Change the value to the number of Mb you want your site to accept as uploads
  • Press Ctrl + F and type "max_execution_time" (click Find...", where needed)
  • Change the value to 600
  • Press Ctrl and S or the save button.
  • Exit your editor.
  • Restart your webserver to reload PHP with the edited changes.
    • For IIS
    • Open the Start Menu on your server and select "Run"
    • Type "iisreset /RESTART"
    • For Apache 2 and Windows XP
    • Go to Start > All Programs > Apache > Restart
    • For Apache 2 and Windows Server
    • The following command will work as long as you have installed Apache 2 as a service on your Windows Server
    • Open your Start Menu on your server and select "Run"
    • Type "httpd -k restart"
Your new file size limit should now appear in Administration > Security > Site Policies > Maximum uploaded file size
NOTE: These instructions also cover the Xampp Windows installer. Just replace C:\PHP with C:\Moodle\server\php and to restart your Moodle with a normal stop-start.

Thursday, 1 August 2013

Moodle Course list in Wordpress

This plugin will allow you to display a list of Moodle courses for a specific user of Moodle.

http://wordpress.org/plugins/moodle-course-list-widget/

This section describes how to install the plugin and get it working.
Install: 1. Upload moodle-courselist-widget.php to the /wp-content/plugins/ directory 1. Activate the plugin through the 'Plugins' menu in WordPress 1. Place the new Moodle Courselist widget into your theme's sidebar.
IMPORTANT: You will need to edit the code of this plugin in 3 places in order for this to work properly. This will most likely involve a web administrator as you will need database connection settings for Moodle. This plugin is designed for use by educational institutions. Changes are clearly commented in the code with //CHANGE.
Here are the code changes you must edit:
Line 35 (Your Moodle Site URL)- action="http://yourmoodlesiteurl.com/login/index.php
Line 44 (Moodle Database Connection)- mysql_connect("localhost","MySQLusername","MYSQLpassword");
Line 76 (Your Moodle Site URL)- "http://yourmoodlesiteurl.com/course/view.php?id='.$course->courseid.'"


User Authentication Wordpress to Moodle

Wordpress to Moodle pass through authentication plugin (wordpress end)

wp2moodle--wordpress-

Wordpress to Moodle pass through authentication plugin (wordpress end). Takes the user that is logged onto wordpress and passes their details over to Moodle, enrols them and authenticates.
Note, you must to rename the zip to be just 'wp2moodle.zip' before you upload the plugin to wordpress.

Activating and configuring the plugin

  1. Upload this to your wordpress (should end up being called /wp-content/plugins/wp2moodle/)
  2. Activate the plugin
  3. Click wp2moodle on the wordpress menu
  4. Set your moodle url (e.g. http://your-site.com/moodle/)
  5. Set the shared secret. This is a salt that is used to encrypt data that is sent to Moodle. Using a guid (http://newguid.com) is a good idea. It must match the shared secret that you use on the Moodle plugin. (https://github.com/frumbert/wp2moodle-moodle)
  6. Other instructions are available on the settings page.

How to use the plugin

  1. Edit a post or a page
  2. Use the moodle button on the editor to insert shortcodes around the text you want linked
  3. When authenticated as subscriber, contributor, etc, click on the link.
Note: If the user is not yet authenticated, no hyperlink is rendered. The link does not function for Wordpress admins.

Shortcode example

[wp2moodle class='my-class' cohort='course1' target='_blank']Open my course[/wpmoodle]
class: the css classname to apply to the link (default: wp2moodle) target: the hyperlink target name to apply to the link (defaut: _self) cohort: the name of the moodle cohort in which to enrol the user
Licence:

GPL2, as per Moodle.
                                                                                                                                                  
Moodle end of a Wordpress to Moodle Single Sign On auth plugin

wp2moodle--moodle

This is the Moodle-end of a two-part plugin that allows users to authenticate within wordpress and open a Moodle site. To get the Wordpress-end plugin, check this git: https://github.com/frumbert/wp2moodle--wordpress-
Data is encrypted at the Wordpress end and handed over a standard http GET request. Only the minimum required information is sent in order to create a Moodle user record. The user is automatically created if not present at the Moodle end, and then authenticated, and (optionally) enrolled in a Cohort.

How to install this plugin

Note, this plugin must exist in a folder named "wp2moodle" - rename the zip file or folder before you upload it.
  1. Upload/extract this to your moodle/auth folder (should be called "/~/auth/wp2moodle/", where ~ is your Moodle root)
  2. Activate the plugin in the administration / authentication section
  3. Click settings and enter the same shared secret that you enter for the wp2moodle settings in Wordpress
  4. The logoff url will perform a Moodle logout, then redirect to this url. Typically this is your wordpress homepage.
  5. The link timeout is the number of minutes before the incoming link is thought to be invalid (to allow for variances in server times).
  6. Disable any other authentication methods as required. You can still use as many as you like.

Usage:

You can not use this plugin directly; it is launched by wp2moodle from within Wordpress.
Licence:

GPL2, as per Moodle.

Wednesday, 31 July 2013

WordPress Can Power Your Educational Portal

Forget Moodle: 

No doubt Moodle is the standard open-source solution for building educational communities and portals. It’s been around for years, it has huge community, regular updates and contributions. It’s really good.

But forget about it. Use WordPress.

I’m not writing this to bash Moodle. I appreciate the efforts that the community puts in it. Contributing to Moodle is in my plans as well. However, 90% of people who use it can achieve nearly the same functionality with WordPress and several plugins. Advantages?
  • WordPress is easier to install, update, and use
  • It has even larger community and more contemporary interface
  • More free plugins
  • Easier to host (less demanding in resources)
  • A lot more premium plugins and themes
  • A lot more developers available for customization
Need I say anything else? Just look at the downloads – Moodle is more than 30MB zipped! Way too much code and stuff, maybe good, but you don’t need most. WordPress is just 4.3 MB at the moment.
The most important Moodle functions can be replaced with similar, sometimes better, free and premium WordPress plugins and/or themes. On top of that you can add some more of WordPress awesomness – SEO plugins, caching plugins, tons of little widgets and so on. And, you can still host a regular blog along with the educational suite if you wish.
Here is how to replicate the most important Moodle functions in WordPress:

Courses

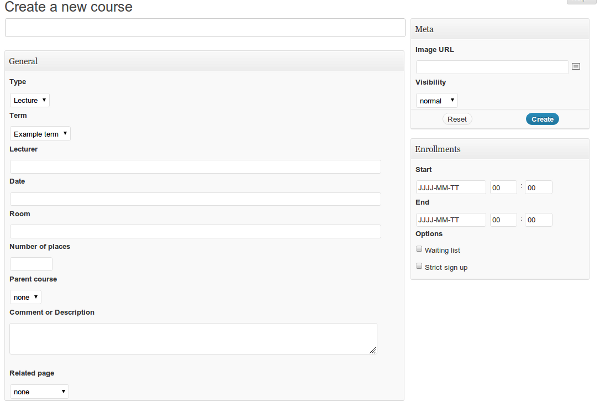
The core of Moodle is creating courses, assigning user groups to them, course reports, assignments. There are two great WordPress plugins that will handle this in one or another way:
TeachPress is properly maintained and up-to date plugin for creating courses with enrollments and publication management.  It has only one version that’s entirely free. Scroll down their site to see a bunch of screenshots and get an idea what you can do with it.
On the other hand if you want to run education suite that’s more of a community thing, you may want to first install BuddyPress. This thing is huge: it turns your WordPress site into a social network and then you can go further and extend it with more plugins and themes. (Right, this means to extend a plugin with plugins).  So once you extend WordPress with BuddyPress you can add educational capabilities with the great BuddyPress ScholarPress Courseware. It’s also fully open-source and free, well supported and frequently updated plugin. Allows managing courses, lectures, basic quizzes, assignments, and schedule calendars.
Now there is also the completely free Namaste! LMS which is also built by us. We have huge plans on it, so it’s worth taking a look!
As these all-in-one plugins sometimes don’t have exactly what you need and may be clumsy in some areas, there are more niche-ones that can handle individual tasks better.

Exams

This is the area where Watu comes in place and sometimes its premium version. Watu lets you create exams with single-choice, multiple-choices, or open-end questions. Assign grades, points, display results instantly. In the premium version you can also keep stats of the taken exams, limit by user group and categories, email user results, set times, assign certificates and so on.
WatuPRO Screenshot
You may also want to check WP Survey And Quiz Tool which is heavier but has some other features that may sound compelling to you. It seems to be more appropriate for running surveys rather than exams.

Assignments

One great plugin for handling assignments is Cleverness To-Do List. Tasks can be assigned to different users along with deadlines, various permissions etc. Regular assignments for whole groups can be handled by adding a post to a selected group and connecting it with an exam.
Of course don’t forget that BuddyPress ScholarPress Courseware also has assignments module.

Chat

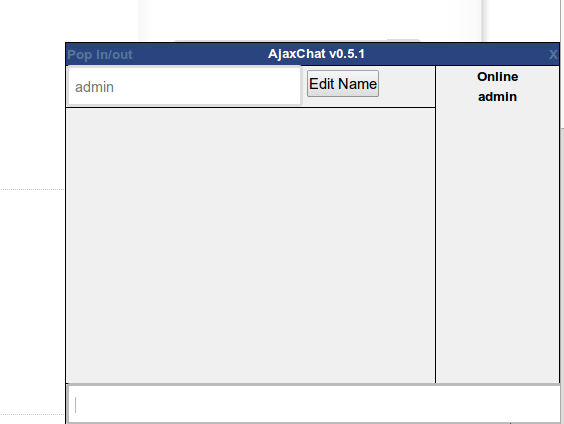
Chat plugins are abundant. You can use a simple self-hosted and free solution likeAjaxChat or get rid off the hosting hassles  and subscribe for something like LiveChat orChatRoll.
Ajax Chat Scheenshot
AjaxChat
If you only need a pretty simple thing then install a shoutbox like Schreikasten orBuddypress-Ajax-Chat and you are all set.

Polls

Polls are useful not just for educational sites but also in marketing and sales, or any other site that needs to get user feedback. But for educational suite perhaps the most useful will be WP-Polls (free).
Now if you want to relate poll answers to users and extract more detailed stats you may prefer to use a plugin for creating exams or surveys.

Forums

There is no shortage of solutions here as well. While BBPress is the standard choice, you may wish to check ForumPress too. A PRO version is expected soon.
You may notice I sometimes favor paid versions. This is not just to encourage paying for quality stuff and helping WordPress developers to do their great job. If you are running a site that makes money, spending few bucks on a premium plugin may help you stay over the competition by having something they don’t have. Premium plugins usually come with high-class support too and are more user-friendly (well, not always, but most are).

Glossary

Glossary is another thing you would want to do even if your site is not educational portal. But speaking about education sites, My Instant Glossary is one of the best choices. With free and premium version it can handle different glossary terms, tags, auto-link categories etc. An entirely free alternative is WordGallery Glossary which is one of the few relatively up-to-date ones. (That’s why I told you premium/paid is often better).

Resources

Moodle has a Resource module which can display different media types along with a lesson or course. WordPress itself can handle resource listings in many ways – the simplest is just to use the rich text editor in a post or page and link to various files or media. Because of this, there aren’t any notable plugins for handling on-page resources. If you plan to list external resources you may want to check some directory plugins. In most cases the WordPress is good enough to handle this functionality by its core.

Survey

Although close to exams and quizzes, surveys have slightly different purpose. So the best plugin for adding surveys is probably WP Survey And Quiz Tool. A simpler solution is again Watu (besides its primary purpose is exams) and WordPress Simple Survey. The latter has extended version for $50. Unfortunately the authors don’t at all make it clear what else is available in that extended version.

Wiki

Wikis can be very useful in learning communities as your members can save you a tremendous amount of work. (I guess I’d need to create Wiki on this blog, so members can write about wikis. How meta!).
An excellent premium wiki plugin is available from WPMUdev. Their plugins cost $39 each – but the better alternative is to be a paid member. Once a member, you can download all of the 140+ premium plugins.
A decent simple alternative is eSimple Wiki from the official WordPress repository. I guess this plugin may be abandoned soon because it hasn’t been updated for nearly two years.

Workshop

There are plenty of ways to handle workshops and events. If you need a thing with lots of features then The Events Calendar by tri.be is going to be your choice. They also have a PRO version priced from $50 to $250. There are widgets, registrations for workshops, Google maps integration, and more.
A simpler solution may be my Eventy which is really easy to set up and use, and the PRO is only $29.
Eventy Screenshot
Eventy
If your workshops involve webinars you may need to use some webinar software too. Theonly decent plugin I found is quite pricey so you may prefer to use some hosted webinars solution outside of WordPress.
Yes, Moodle fans, some of these features are more complicated and rich in Moodle. But most of us don’t need that. WordPress works in 90% or so of the cases and most webmasters are more comfortable with it.
As for Moodle, it’s a great stuff if you really need what it offers and have the patience to learn working with it.

Moodle and WordPress Single Sign On in 20 minutes – Part 1

Even if i am a Sysadmin, i like to do web things (possibly challenging), and this time, it’s time to make wordpress authentication work on moodle too.
Scenario:
Wordpress installation and Moodle installation.
We are going to use the WordPress database in order to authenticate users within Moodle. Thus, we can sell courses using wordpress ecommerce plugin and have instant access from customers.
The two sites are on the very same machine but on different domains (actually WordPress is in the “www.domain.tld” and “*.domain.tld” subdomains and Moodle is on another subdomain (courses.domain.tld) so we need to authenticate users in both sites using the very same database and table.
The Problem: The Moodle external autentication plugin does not work with WordPress authentication out of the box, instead, it will need a couple of modification very easy to be made, don’t worry, even for a non php skilled person.
We will come back on this later on this post.
Let’s start our 20 minutes modification!
Shop list:
  • WordPress Version 3.4.2
  • WordPress database informations
  • Moodle Version 2.0
  • Moodle External Database Authentication Plugin (already in the Moodle defaultinstallation)
  • Some coding so, all stuff for ftp things/sftp/ssh things and a decent text editor with some failsafe feature (save a copy before modify etc)
That’s enough to start working on.
Once installed the two systems, you will have to properly configure the external database authentication plugin on Moodle platform. To do this you have to authenticate yourself as site administrator, then on the menubar choose and click on “Site Administration” -> “Plugin” -> “Authentication” -> “Manage Authentication”.
You can use the provided image on the left to quickly find out the links path needed to get there.


Once there you will see a list of all authentication plugin, their status (active or inactive) their priority order and their “settings” link.As you can see in the image below, you have to enable and prioritize the plugin in order to make it work. You probably want to disable the self-registration (see picture in bottom part) feature in order to prevent user to signup using moodle platform because, otherwise, all users created within Moodle will not be able to authenticate themselves against WordPress.
This is the list of the moodle authentication plugins. It shows if a plugin is enabled or not, and it exposes a link for each plugin to be configured.
Once you have done, let’s click on the “Setting” link and let’s try to configure this plugin at it best.
We have to enter all info used by Moodle to read the WordPress database.
Fields are:
  • Host, in my case i will use “localhost” and probably you too unless your db is hosted on a different machine, in that case you have to use the Hostname or ip address of that machine
  • Database, in my case “mysqli” (Please, notice the trailer “i” – mysqli and notmysql).
  • Use sybase quotes, we do not need this to be on so we will leave it on “NO“
  • Db name, the name of your wordpress database (get it from wp-config.php)
  • Db User, mysql user that can access WordPress db tables
  • Db Password, mysql password for mysql user
  • Table, the name of the table where username/passwords are stored. The most of the time is “wp_users” unless you changed your table prefix
  • Username Field, the field containing the username, for WordPress: “user_login”
  • Password Field the field containing the password for username for WordPress: “user_pass”.
  • Password Format, we should choose “wordpress” format but there is no such option in this drop down, so what? we will solve this later, don’t worry
  • External db encoding, i use “UTF-8″
  • SQL setup command, you can leave it blank
  • Debug ADOdb, choose “NO“
  • Password-change URL, we use the wordpress password recovery page link
These are the needed field to make this thing work, if you want more integration, you can configure the part named “cron syncronization script” and sync information such as first name, surname, user preferences and so.
But now we have to stay focused on the missing dropdown item and find a way to get it out of there.
We need to modify the file in /auth/db/config.html and change this (at line 190)
$passtype = array();
$passtype["plaintext"] = get_string("plaintext", "auth");
$passtype["md5"] = get_string("md5", "auth");
$passtype["sha1"] = get_string("sha1", "auth");
$passtype["internal"] = get_string("internal", "auth");
echo html_writer::select($passtype, "passtype", $config->passtype, false);
to this
$passtype = array();
$passtype["plaintext"] = get_string("plaintext", "auth");
$passtype["md5"] = get_string("md5", "auth");
$passtype["sha1"] = get_string("sha1", "auth");
$passtype["internal"] = get_string("internal", "auth");
$passtype["wordpress"] = "wordpress";
echo html_writer::select($passtype, "passtype", $config->passtype, false);
This modification will make “WordPress” authentication drop down item available, but still not working.
We need to process the password with this class: class-phpass.php [Phpass Website].
This class, can actually process passwords the same way wordpress does, so this is the missing link to make sso work.
Just copy the file class-phpass.php in your /moodle/lib folder
And then add this line right after other requires at the beginning of wp-login.php:
require_once($CFG->libdir."/class-phpass.php");
.
To make our modifications work we need to add a few lines of code to the file /auth/db/auth.php, it’s easy. Open the file and go about line 90, you should see something like this:
if ($this->config->;passtype === 'md5') {   // Re-format password accordingly

$extpassword = md5($extpassword);

} else if ($this->config->;passtype === 'sha1') {
$extpassword = sha1($extpassword);
}

Now, let’s do our final modification and right after the lines here, add this code:

else if ($this->config->passtype === 'wordpress') {
$hash =new PasswordHash(8, false);
$rs = $authdb->Execute("SELECT * FROM {$this->config->table}
WHERE {$this->config->fielduser} = '".$this->ext_addslashes($extusername)."'");
$check = $hash->CheckPassword( $extpassword, $rs->fields["user_pass"]);
return $check;
}

If you are so lazy as i am, you can download a copy of both file here, but i strongly suggest you to make modification by hand because time goes by and releases change.
Now, finally we can come back to the settings page ad add “WordPress” as “Passwordformat“.
All you have to do to try if this works, is to logout from wordpress, signup intowordpress as new user, and then go and authenticate with the same credentials against Moodle. If all work you will be redirected to the user profile page on moodlewhere you can complete your profile with your informations.